One girl's journey through crowd learning. I'm going back to school...but this time I'll be attending the University of You. This is my one year course of actively learning 3 new trades, mostly from people on-line, and trying to redefine what it means to be an expert.
A brow grooming and shaping kit that will help you create a perfect set of arches. Compact contains seven essential tools. Be your own brow guru, shaping your brows is easy as 1-2-3!
Contains -Straight edged tweezers -Slanted brow filler brush -Brow bone sponge applicator - 3X magnifying mirror -Brow bone highlighter and two tone-on-tone powders to fill and shape brows.
9-5: Beauty For Everyone Review 1. Affordable: Yes (Under 10)
2. Easily Available: Yes (Most Drugstores)
3. Effortless Application: Yes
4. Wearable: Yes
Overall Beauty for Everyone Rating: 4 out of 4 stars
1. Affordable: Absolutely! At only $6.99 it is a steal. 2. Easily Available: Yes, it is available at most drugstores including CVS, Riteaid, and Walgreens, and anywhere else Milani is sold. It comes in 3 different tones, light, medium and dark. I've purchased it twice now, and have never had a problem finding it again. Although I've never seen the darkest tone, and and didn't know it existed until I went to the website. 3. Effortless Application: Lets break this down tool by tool. -The straight edge tweezers require a little more pressure than what I would like and not particularly sharp. But in a pinch it will do. (Like when you are driving to work look in the mirror and notice one or two rogue eyebrow hairs). - The slanted brow filler works surprisingly well. I am used to just throwing out those little brushes right away, or saving them up as disposable spares. It isn't as firm as most slanted brushes, and it's miniature 2 inch handle makes it not as comfortable as a full size brush, but it applies powder well, with minimal fallout and pretty precisely too. - The sponge applicator I can do without, but I generally don't use this kind of tool anyway. -The mirror- while I like that they included it, it is so small it is pretty hard to use, especially when you have all those little tools poking out of the top.
Paddington says, "Careful now, don't poke your eye out!"
-Brow bone powder (Top) is a tad too sparkly. I'd skip it on the brow bone but I don't mind it so much as a brightener on the inside corners. The two tone brown powders work well together, stay put, and most importantly are easy to apply, I often do this in my car mirror right before going into work.
4. Wearable: Yes I am not a fan of the overly painted brow. I think I will leave that for these girls.
But I am a big fan of really strong well shaped natural looking brows. I think there is something ultra feminine about it. A prominent brow exudes confidence. Pair it with a red lip and you are unstoppable.
Exhibit A
Exhibit B
I have a fairly strong brow, but I do like a little help and this kit helps me get there. Medium works well for me, especially when I mix the colors together. I think it works well for a done, but not too overdone look.
Hooray for eyebrows
A special thanks to my beautiful fashionista blogger friend Laura Lily for leading me to
Bloglovin. <a href="http://www.bloglovin.com/blog/3867587/university-of-you?claim=hyazkfkhj78">Follow my
Follow her and learn how to look fab without spending a fortune.
And an even bigger thanks for inspiring me to not be such a slacker when it comes to blogging.
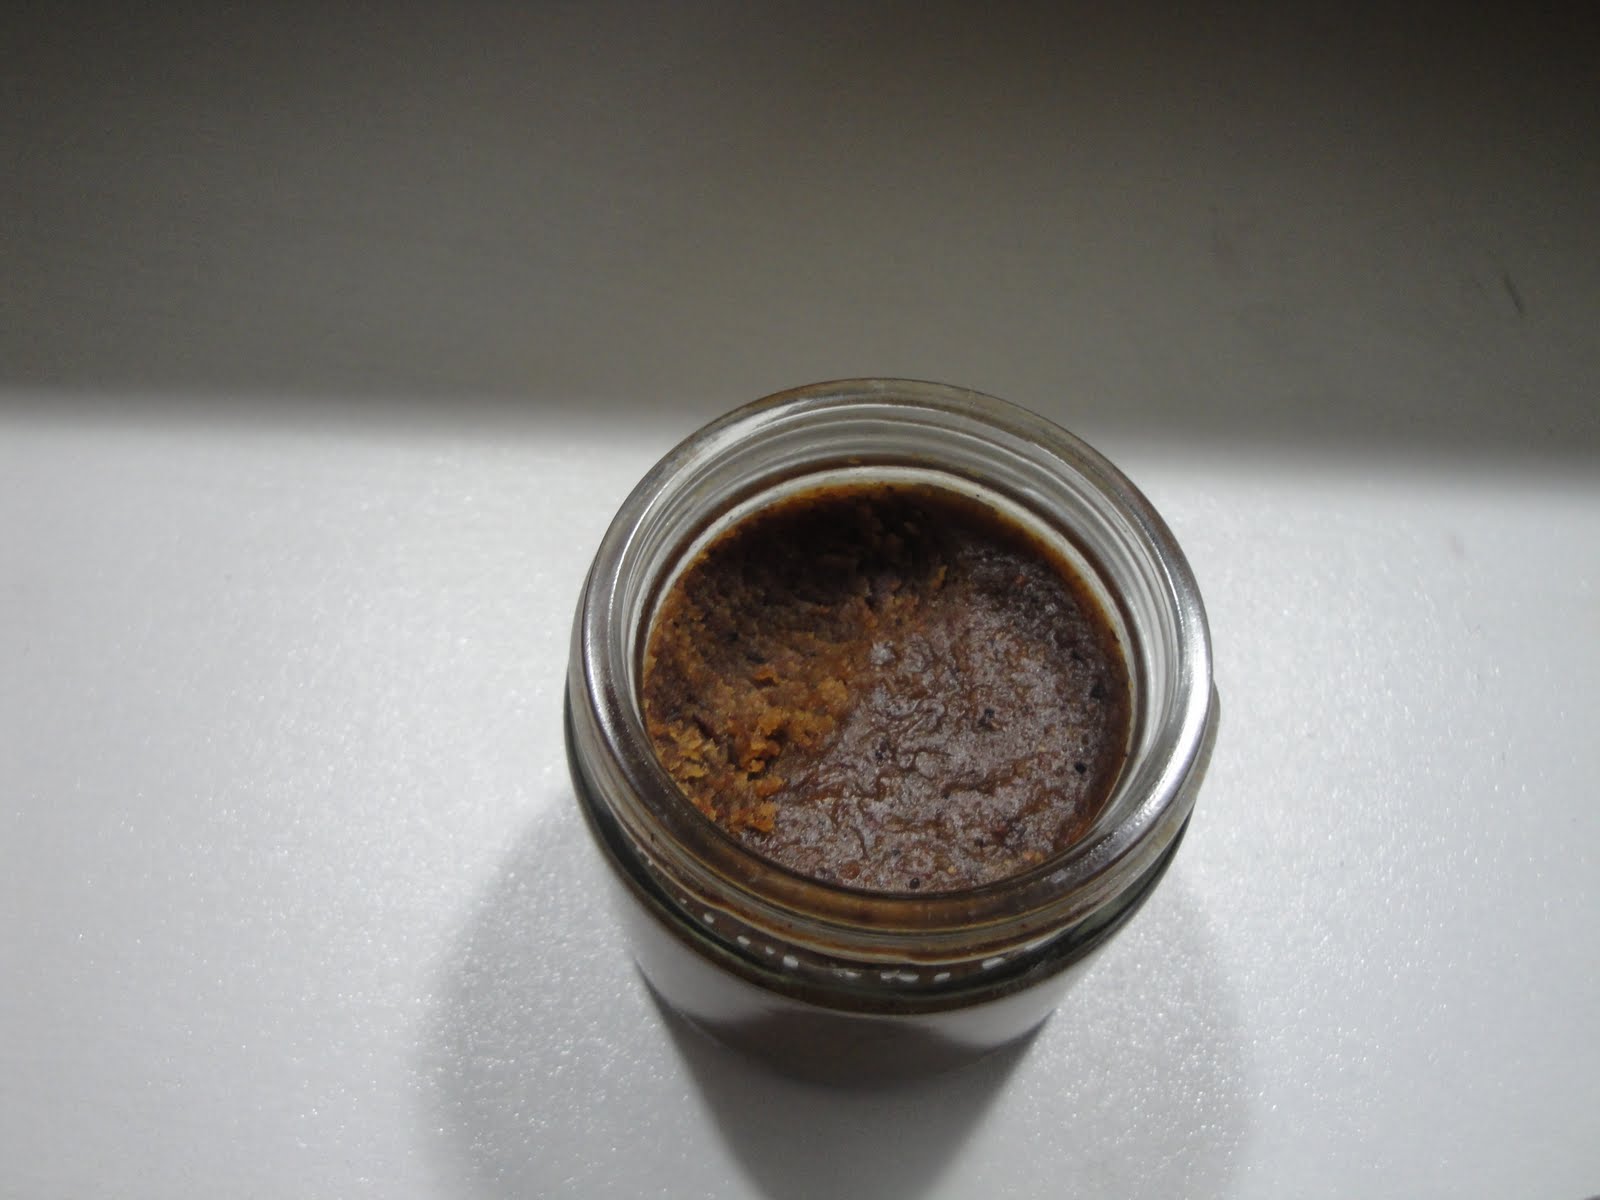
From the Website: Infused with refreshing Sweet Orange and Grapefruit Oils, this facial scrub removes dirt, oil and makeup. Formulated with Ground Almonds, Oats and Pecans to gently exfoliate while Sweet Almond Oil and Glycerin help moisturize your skin. It’s something to celebrate!
-Helps removes dirt, oil and make-up with a blend of Sweet Orange and Grapefruit Oils -Exfoliates gently with Ground Almonds, Oats and Pecans -Helps moisturize skin with Sweet Almond Oil and Glycerin
9-5: Beauty For Everyone Review 1. Affordable: Yes (Under 10)
2. Easily Available: Yes (Target)
3. Effortless Application: Yes
4. Wearable: Yes
Overall Beauty for Everyone Rating: 4 out of 4 stars
1. Affordable: For under 10, it is a steal. It runs about $7 and can last up to 6 months if you use it as a once a week exfoliator. I use it everyday, and it still lasts about 2 months.
2. Easily Available: I wish it was also at CVS or Walgreens, but Target is just as easy to get to.
3. Effortless Application: Take a small dab, slightly larger than pea size and add a drop or two of water. Rub into the skin, gently exfoliating and revealing fresh, glowing, beautiful skin. And since it is natural, I even use a little to exfoliate my lips as well. Rinse off and you are done. I definitely prefer doing this at night instead of the morning, since rubbing can make my face just a little red. And my skin still feels oh so soft the next morning. I love the smell and texture, kind of like a holiday spiced oatmeal. It's like health food for your skin.
4. Wearable: I love doing this every night, and even look forward to washing my face. My skin feels supple and soft, but not greasy. It doesn't leave behind any residue and is the only thing that has ever gotten rid of my blackheads.
According to the website: -Buttery Balm + Shiny Color -Buttery balm with beautiful shiny color to give you baby soft, healthy glowing lips 94% of women felt lips were softer, smoother, and instantly hydrated. - Hydrating mango, shea and coconut butter formula boosts lip moisture by 156% - Pampering gel formula provides super charged hydration and glides on lips buttery smooth - Sheer to medium colour with buttery shine - Available in 20 luscious shades
9-5: Beauty for Everyone Review
1. Affordable: Yes (under $10)
2. Easily Available: Yes
3. Effortless Application: Yes
4. Wearable: Yes
Overall Beauty For Everyone Rating: 4 out of 4
1. Affordable: Absolutely! Target has them for around $6.50 and CVS has them for $7.50 but frequently has them as buy 1 get 1 50% off.
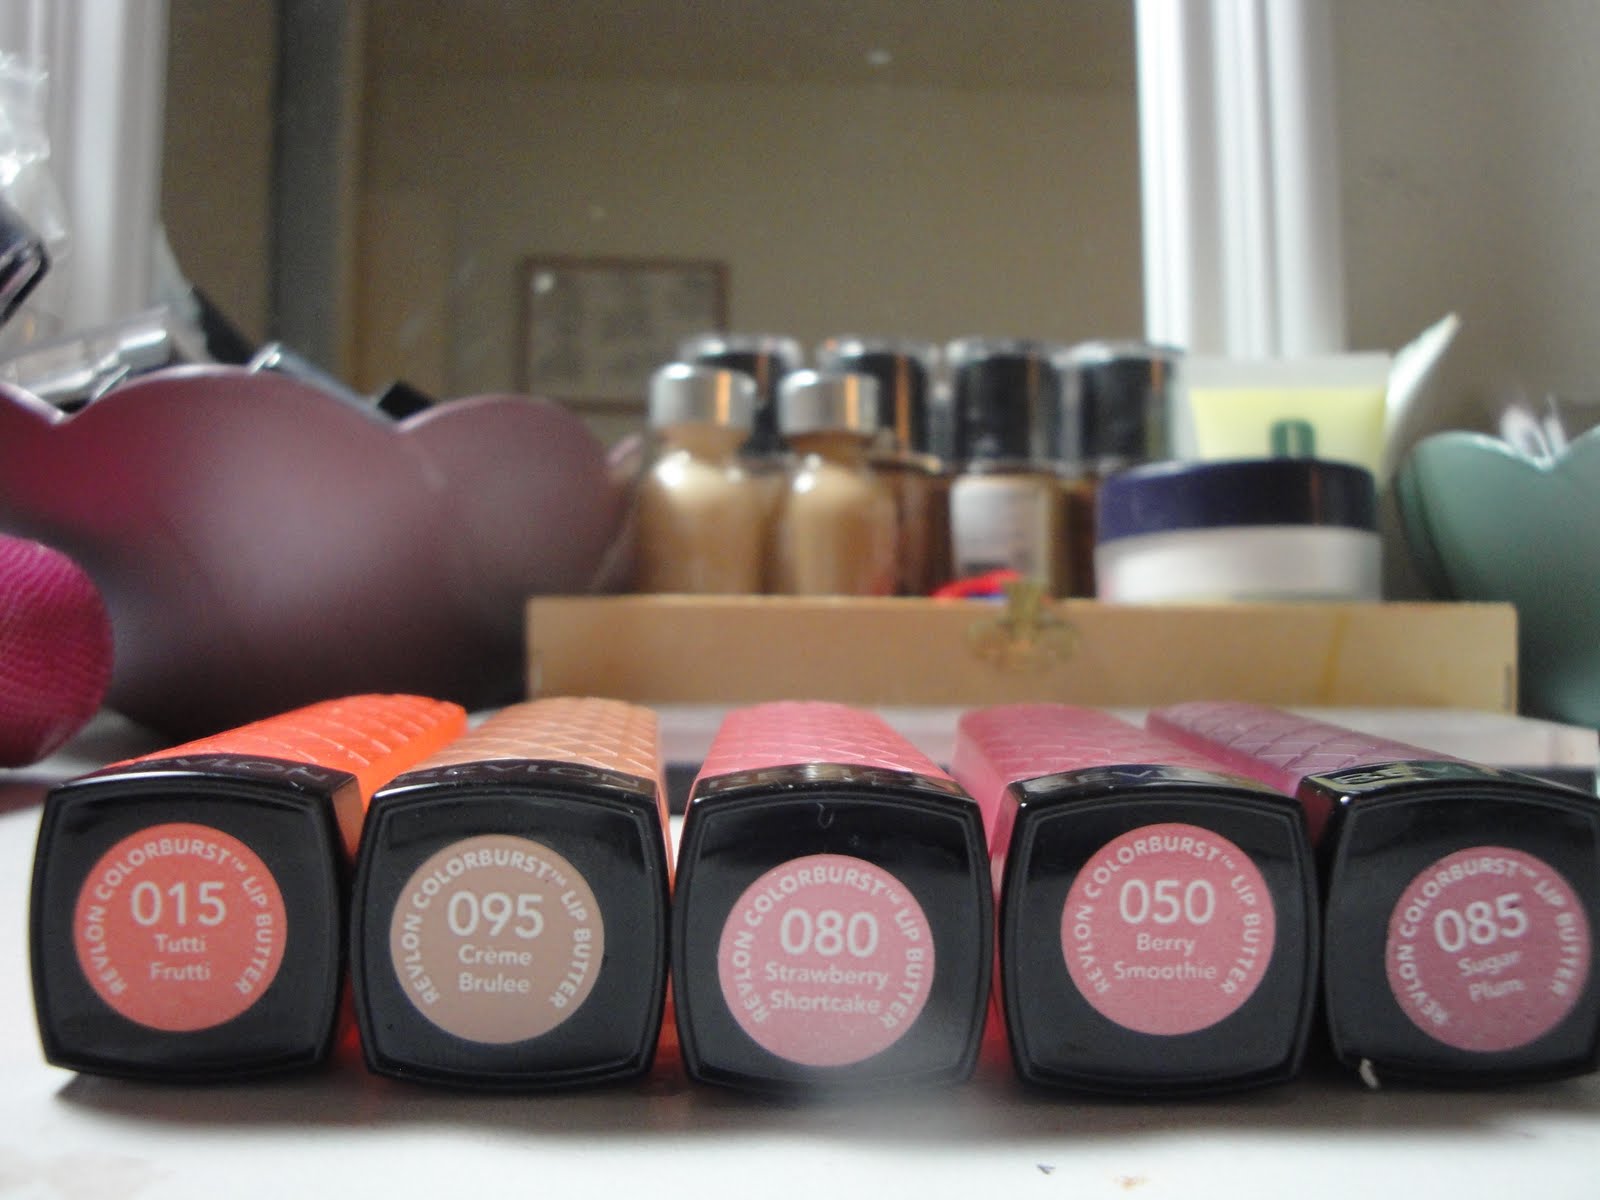
2. Easily Available: I bought one every time I entered CVS. Now that they are available at Target, they are even easier to find. They are wildly popular right now, so a few colors may be sold out. Luckily they are all beautiful. I have purchased these 5 so far. Actually my husband bought me 2 of them for Christmas!
3. Effortless Application: It has way more pigment than you would expect from a lipstick like this. It goes on super smooth, and is rich and creamy. I like that I can put it on straight from the tube, no lip liner, no prepping. It has a lot of color, but at the same time is somewhat sheer. If you are not used to wearing lipstick, or are just trying to upgrade from your usual lip gloss or go to lip balm, give these a try.
4. Wearable: The colors are great! These butters pack a lot of color, but because of their somewhat glossy creamy texture, even the crazy looking ones like Tutti Frutti are totally wearable. Some of them have a slight iridescence, but nothing too sparkly. It is the first collection I have every wanted as a whole collection.
Overall 9-5 Rating: 4 out of 4 stars
There are tons of swatches of these all over the place. Karla Sugar has them all swatched here. But personally I like to see them on people, so here they are on me.
In Tutti Frutti (015): A really nice kind of coral shade. Probably my favorite of the bunch.
In Creme Brulee (095): A soft browny neutral with just enough shine. Try it with a little more color in the rest of the face.
In Berry Smoothie (050): A soft pink with a hint of gold.
In Sugar Plum (095): A slightly deeper pink with purple undertones.
What I Look For In Makeup For Personal Everyday Use
When I buy makeup or beauty products for personal everyday use, I like to keep a few criteria in mind.
Criteria
1. Affordable:
2. Easily Available:
3. Effortless Application:
4. Wearable:
Overall Beauty for Everyone Rating: 1 star for each criteria met.
1. Is it affordable? $65 for a blush palette is fine for my kit, but I could never justify such a splurge for something I wouldn't actually use very often. I wouldn't reccomend it to my friends either. For personal use I like to keep it under $15, unless I am actually treating myself, or it really will last forever.
2. How easy is it to find? Can I purchase it on a whim? If I didn't do makeup, going to Sephora or ULTA, Frends Beauty Supply, or even shopping on line might actually be a big hassle, not to mention overwhelming. My favorite hassle fee time to shop for things on a whim is when I am already there. I look for items on sale while waiting for a prescription at CVS or take a detour into the beauty isles at Target when I go pick up trash bags or toilet paper. If I have to make a special trip for it, well it's not that hassle free.
3. How easy is it to use and/or apply? I own a lot of makeup and a lot of brushes, but not everyone does. And honestly, sometimes I just don't want to be bothered with it. I look for products I can fit into my everyday 10min makeup routine. These are products I will usually put on while sitting at my vanity, but I can also toss in my bag if I am in a rush, or put on in the car just before going into work. I tend to lean towards the more sheer side, since it is more forgiving when the application needs to be very quick. But sometimes minimal and bold works too. For makeup, it needs to last to lunch, but not through it. If it rubs right off, fades, or just plain vanishes in an hour, it is probably not that great. I don't really have time for touch-ups every hour at work, but I don't mind a little maintenance at lunch. I very rarely do touch-ups at work, but I like knowing it is in my bag if I decide I want to.
4. How wearable is it? Do I like it enough to work into my everyday look? There are plenty of products I love, but are not really appropriate to wear to work. A slight iridescence is ok. but anything too sparkly or shimmery is is little too overdone for the office. (For my office anyway- I work in education). You don't want to look too made-up or like you are wearing the same makeup from your previous night out.
When I first started doing makeup, well more seriously doing makeup anyway, I was worried. I was worried it would change me into someone who obsessed about my looks. I was worried the more I learned about the products and application, that I would want to start putting more and more on my face for everyday looks. What if I fell in love with false lashes and I decided I NEEDED to wear them everyday!
I am happy to report, that although I admit to being more preoccupied with my vanity than I was before, I have not crossed over to the all- glam-all-the-time side. In fact, the opposite has happened. I find myself constantly looking up natural looks, new ways to apply makeup for that un-done look, and looking up the best videos on the no makeup makeup. My current favorite is Lisa Eldridge. I can watch her for hours. And she has a massive body of work.
In part, this preference is due to the fact that I have a normal 9-5, and the fact that I am not 17 or even in my early 20s for that matter. I wouldn't want to hear, "oh your makeup is so pretty today," because I'd much rather hear, "you look so pretty today." Well actually I'd rather hear "you are so clever, or talented or creative etc." but ok, "pretty" doesn't hurt either. (See the vanity coming through).
I think that's why I like makeup for film so much. It's about enhancing natural beauty. I get a lot of question from friends who don't really wear much to begin with, and I always steer them towards a really natural look. Because when I get these questions, no one is asking, "How do I wear more makeup?" Mostly what they are asking is, "How can I look better everyday, fit it into my busy schedule, and not spend a fortune?"
And the answer is always the same. "You already are beautiful. You have really great______. But here are a few products to help enhance your beauty and give you a more polished and really healthy look."
In my case, I have clear skin so I try to play it up as much as possible. The first picture is my Before: No Makeup. I smiled anyway, I mean why be sad and glum when you are showing off what your mama gave you. The second look is my No Makeup Makeup look. I still look just like me, I just have a healthy slightly glowy look. I look awake and ready for the day, without looking like I'm really trying. This really is one of my favorite ways to wear makeup.
Before: No Makeup
After: No Makeup Makeup
So this section is for you, my friends who I have helped, and those that I have yet to meet. Those of you who may or may not love makeup, who just need help picking out products that fit into your life and style. This section is Beauty for Everyone.
I don't consider myself a beauty blogger, more of a beauty learner. I read a lot of blogs, watch a lot of videos on YouTube and Beautylish, and look up product reviews nearly everyday. I watch, I learn, and write about it here.
While browsing tons of videos it's easy to get caught up in all of my own flaws and start thinking in very superficial terms. And then I stumble upon a post or a project like Gwapa 'Beautiful' - an Inspirational Documentary that puts things in perspective and reminds me what beauty really means.
Growing up, I knew that being intelligent was far more important than being pretty. And so I am by no means a glamour girl, nor do I want to be. I have Vitiligo which effects the left side of my face. I have large white spots all around my left eye and left cheek. I have an eye that is a little droopy, and a nostril that is slightly smaller. But as much as I pretend not to care about my flaws, I sometimes find myself dwelling on them. And so I pick up a makeup brush and start covering all those flaws. A few minutes later, and no ones knows.
When I work on film projects, I do the same for the actors. I take out the redness, cover small blemishes, slim the face and cover tired eyes. I try to make beautiful people more beautiful. A few brush strokes later, and they are a better version of themselves.
But what if it wasn't that easy? What if you woke up thinking you were not beautiful, not worthy of love, or shunned by society because of your appearance?
Gwapa(Beautiful) is a documentary by Thirsty Girl Films that "follows a poor Filipino family’s struggle for a healthy future and a mother’s remarkable journey to help her three kids with facial deformities."
"Children with clefts are often abandoned or shunned from society. The lucky ones are accepted into their families, but rarely leave home or attend school. Likewise, children with cleft lips and palates run a higher risk of dying of disease and illness. Cleft lip and palate is one of the most common and most curable of birth defects, but surgical repair is almost unheard of on the smaller islands. Sadly, most clefts go unrepaired in poor countries like The Philippines. Just one surgery can change a child’s life forever."
Thirty Girl Films is currently running an Indiegogo campaign in an effort to raise the funds necessary to finish filming this beautiful documentary. They plan on traveling with Faces of Tomorrow on their mission back to the Philippines in January 2012, to spend two weeks filming the Bulabos and Alac families.
This campaign is coming to an end and you only have a few days left to help make this project happen. This Holiday season, consider donating to this project and giving the gift of beauty and hope. "Because every child deserves the chance at a beautiful and healthy future..."
To donate, learn more and keep spreading the word please visit:
Well I suppose, better late than never. First an excuse, then a confession.
The excuse: I have been super busy. Between the web-series, several networking events and a few other makeup related projects I have been working on and doing research for, I have been too pooped to finish out my 4th week of instruction.
A confession: While that is all true, the real truth is that I hit a bit of a block this lesson. I did the research, and worked on the look over two weekends and hated every picture I took. The contouring was either too heavy or not even noticeable. It's easy to say, "I'll post pictures of all my triumphs and failures." Turns out posting isn't as easy when it's about your failures. So I admit, I waited until I was able to get something I was happy with.
What I tried:
Jlo and Kim Kardashian are by far the "Queens of the Contour." Regardless of whether you are a fan or not, they are both stunning and who doesn't want to look and feel like a glamor queen every so often. It's no wonder there are so many videos and blog posts dedicated to getting that really sculpted look.
I mean who hasn't seen a Kandee Johnson video? Here she does a great job breaking down the basics of contouring. Make sure to click on the second video that shows you how to highlight. She uses concealer pencils, and a darker color powder. This one is totally wearable.
For a more dramatic runway type look, here is Sam's take on it. It is a bit extreme, but if you are new to it, it is a great video to see where the highlights and contours really go. She uses mostly powders for the contours and really explains what color you should use and why.
My first attempt was too light. I first tried with powder but it ended up too diffused and I was not able to blend it out completely. It made my face look dry and dirty, not glamorous at all.
For my second attempt, I used liquid foundation. The darkest shade I had was far too warm and orange. I took too long to blend it, and it ended up looking streaky. It was a little too, "hey look I contoured my face." But I suppose it could have been worse. Sorry Lindsay Lohan. (Allure.com)
As I sat there staring at my face wondering what I need to do differently, Finally an "ah-ha" moment. I noticed the hair casting shadows across parts of my face. I picked up one of my brushes, wondering if I could use it to cast a shadow strategically. Voila!! It worked.
It allowed me to see what color I should use to create the shadows. But best of all, it let me experiment with the shadows on my face without any commitment at all. I was able to move the shadow up and down or change the angle by a few degrees. I held it closer for a deeper narrower shadow, and further for a lighter, more diffused shadow. It was amazing to see what a tiny shadow could do to the shape of my face. I was able to experiment with contouring in a few minutes, what otherwise would have take me hours to apply and remove over and over again. With new resolve, I moved on to the "painting" portion of the evening.
What I Learned:
Big take aways this week - For contouring, you need a brownish color that is cool, not shimmery, and matches the shadows already in your face. There are several different ways to do it but you have to find what works for you. For me, it was cream foundation. Powder was too hard for me to control, but the cream was easy to apply and then blend. Also, I learned I actually work a lot better from diagrams or even just reading than a video alone.
Kevyn Aucoin had this great photo in his book Making Faces. So I copied it here using my Graftobian warm palette. The highlight color is Ingenue, and the contour color is Midnight Mariold.
I just like creams better. I am able to blend them better, and they look more skin-like than liquids or powders. The first picture is foundation only, it is about 4 hours old here. The second look is the look above blended out. I used a wedge makeup sponge for most of the blending here. The contour color was probably a little too warm still, but it definitely brings a depths to my face.
Here is the completed look. I added red lipstick, black eyeliner, filled in my brows and put on a red dress. Mostly I just walked around the house feeling glamorous. While I certainly won't be wearing this look to work on Monday, I really like this look. Now I just need somewhere to wear it.
I really pride myself on being a DIYer and finding the cheapest alternative for any project. So when I was asked to create a corpse for the big reveal at the end of episode 1, I was up for challenge. While a corpse is more of a prop than strictly makeup, I figured it was close enough. Luckily, I am a huge Bones fan, so I have seen my fair share of rotting and decaying flesh, well the television version anyway. Take a look at some of these rotting beauties featured in NYmag.com.
I don't like watching gory movies, I don't even like scary movies, and I don't like blood in real life either. But I like Bones, ozzy goozy guts and all. I think I appreciate all the work and creativity that goes into all the makeup, props and special effects. So I was pretty excited to get a chance to make a corpse.
I knew Backyard FX had a lot of really great tutorials, perfect for DIYers like me. I was able to find this one on creating a corpse.
I made a quick trip to Home Depot and was able to gather most of my supplies there, and charm my way into getting my PVC pipe cut according to the dimensions in the video. I made another stop at the 99cents store for pantyhose, a cheap barbie with black hair, and wire coat hangers. One final stop at a theater shop for liquid latex, and I was ready to start building.
I just needed to acquire a foam head. They have them everywhere around Halloween, but in March, they are surprising difficult to find. I only had two days, and Latex takes a while to dry, so I started building without the head.
I named him "Frankie" and here he is, just "bones." The drill I borrowed was too heavy for me, so drilling through the PVC pipe took forever. I enlisted the help of my friend Nahid, and she helped hold the PVC pipes steady. She also helped mold the rib cage seen below.
By the end of the night, I was ready to start wrapping "Frankie" in newspaper to build his paper body, wrap him in pantyhose, and cover him in latex.
Once "Frankie" was dry he was ready for wardrobe. At the end of episode 1, Alejandro discovers his own decaying body, wearing the same clothes he has on now. So Frankie's wardrobe had to match but look much older. I added a few burn holes to mimic heavy wear and tear.
Here he is with Alejandro on the day of the shoot. I wish I had more time, and more latex, but overall I was happy withe the final product. I couldn't fit him in the car after the shoot, so I left him at my parent's house. My mom was so creeped out by it, that he was promptly moved and hidden in the garage. He now resides in my closet, but I can't wait to put him on display somewhere for Halloween.
When I first started I really did not know what to look for in a foundation. I didn't know to look for high pigment, coverage, type of finish, or whether it is build-able. This was before going to IMATS, before realizing there were amazing people out there blogging about makeup, and sharing their expertise on you-tube.
So blindly, for my first project, I just went with L'Oreal True Match foundation. They were really inexpensive, and I had used them personally. I purchased just a few bottles: their lightest and darkest shade and a few in between. They are pretty blendable so they were easy to mix, but really they were so sheer it didn't really matter what color I used. In retrospect, it was probably the worst drugstore one I could have purchased. It was too sheer, had a slightly ashy finish and started to fade and break apart in a few hours.
After that, I went through a lot of videos on the topic and foundation product reviews, both high end and low end. Getting the skin right really is the most important part. Even if you don't like looking all dolled up all the time, everyone wants a beautiful, clear, natural looking complexion. And because it is so important, everyone has a video on it. Here are some of my favorites on this topic.
I discovered MakeupbyRenRen recently and I think she is my new favorite. Here she covers everything for a whole face, from priming to finishing with powder and adding a little highlighting and contouring.
I ended up purchasing a smaller version of the palette used in the video so I could get a feel for it before committing to the full size palette. It is so much easier to find the right color by holding it up and then swatching, rather than going through individual bottles and comparing. Temptress blended right in (4th one down).
I like this video by Pixiwoo because she goes through a few drugstore brands. Not all of them are terrible after all, but they are sometimes hard to pick out since you can't test them. Ultimately, you buy a product for what is on the inside, not the brand on the outside. She takes you through what to look for on the inside. And I love that she actually tests them and lets you see what they look like, rather than just talking about what they are like. GossMakeup Artist
This is kind of an older one, but it is true to the title. Basics of Foundation and Powder. I've been watching Goss for a while and have yet to find a video I didn't learn something useful from.
What I learned:
While I would love to own the entire Make Up For Ever HD foundation, it is not realistically in my price range. Considering it runs $40 a bottle, I couldn't even justify getting even one bottle in my own color. I practice every night, so I needed a cheaper alternative to play with. I opted for Revlon Color Stay after several reviews stated it was comparable to the MUFE line, at 1/4 the price. Its fairly pigmented and has pretty full coverage. But, you do have to blend quickly or it becomes impossible to blend. It doesn't feel cakey, but I definitely can still feel it on. But it does lasts longer than any other drugstore brand I have tried. MUFE obviously has a wider color range, and the option of trying it on before you buy. But when I took a sample home, I honestly didn't see that much of a difference, not a $30 difference anyway. It's not that MUFE isn't fantastic, it's just that Revlon Color Stay is just fine for what I was doing.
But I won't be toting around all 30 MUFE bottles, or even 15 Revlon bottles around with me. I needed something that would give me a full color range and was cheap enough to practice with. I love Kevin James Bennett's In My Kit. It is such a great place to start if you are looking for the biggest bang for your buck when stocking your kit.
That being said, Revlon was fine for practicing at home, and even a recent media promo I did, since the actors needed to look like regular people. However, I needed a more professional brand that I could use on various project. The nice people over at Frends in North Hollywood were great and helped me decide between RCMA and Graftobian. I went with Graftobian because it is a little creamier, so it is easier to handle. It also doesn't require a mixing medium. What a difference using a highly pigmented project makes. Just take a look below.
It covers beautifully, photographs great and a tiny bit goes a long way. For a natural day look, you can just use your fingers to apply it, since the warmth from your hands helps blend it. You could also use a foundation brush to buff it in, like you would with any liquid foundation, for a ultra polished look. I used a dry sponge in the store and loved the coverage. But I like my foundation to take drab skin to just more radiant and even skin, so I use a damp sponge. I then set by dusting on translucent powder, not colored pressed powder which can look a little too made up. The wet sponge helps sheer it out and make it look more like skin, and since it has so much pigment to begin with, it still deposits a lot of color. Even when sheered out, it is still far more pigmented that any drugstore brand, or even high-end department store brand. And the best part is, it is super affordable. Graftobian, you have made a convert out of me.